

The doctor’s app · Day to day
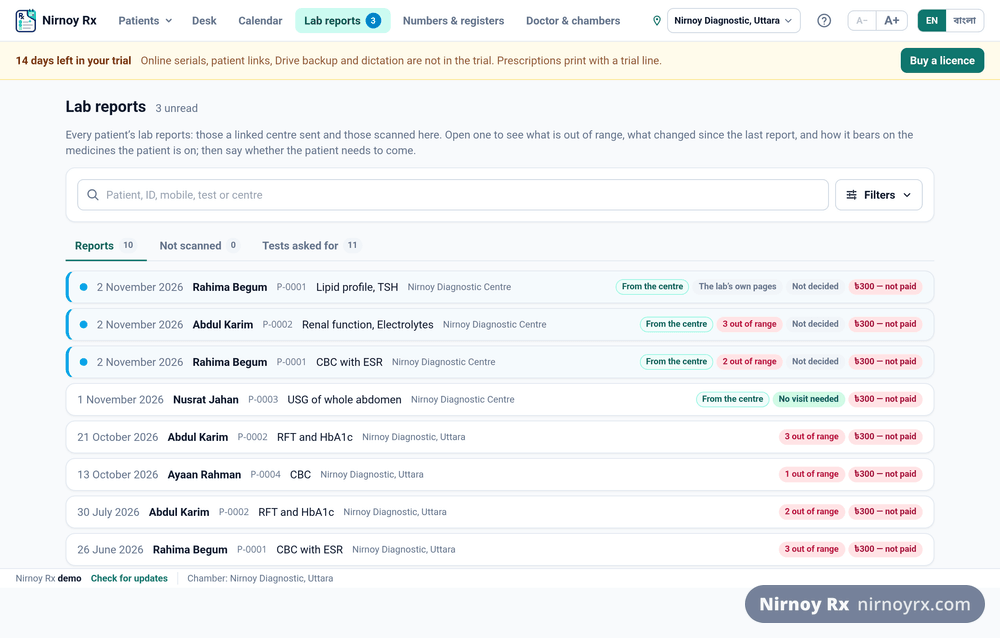
Reading a Lab Report In
Photograph a report and its values go into the patient’s file, along with anything it could not read.
A patient brings last week’s CBC. Reading it and typing it in takes time, and next year nobody can find it. Photograph it instead and the values stay in the file, ready to be set beside the next one.
How It Is Done
- Open the patient’s file and start a new prescription.
- In the strip at the top, press + Scan a report.
- Use the camera: the page is outlined in green on the camera’s picture with a scan line moving over it; press Take it. Or Choose a picture or PDF: a photograph already taken, a scan saved on the computer, or a PDF the laboratory sent. A PDF’s pages are taken as they are (up to the first 10); press Use these pages and they are read together. Save a password-locked PDF without its password first.
- Scanning takes a moment: the page is found by its edges and cut out, squared, turned straight and flattened by its own lines of print, so a curled or folded report comes out with its rows level, and cleaned: the paper white, the print dark, shadows and smudges gone, colour kept. Then it shows you the result. If the page was bent too far to straighten fully, it says so: lay it flat and take it again. Choose Clean, Grey, Black & white or Original; tap the page to open it full screen and zoom in. Not happy? Retake. Edges wrong? Adjust corners. Good? Use this page.
- The page is read at once: on your own computer, free, no credits. Every figure is looked at three separate times. A figure in any doubt, faint print, the three looks not agreeing, ten times beyond the range printed beside it (how a lost decimal point looks), an H or L that does not fit the range, is marked in amber with the reason, beside the strip of the page it was read from.
- A report written in sentences with no table (an ultrasonogram, a cytopathology or histopathology report) is read part by part, word for word: Examination, Specimen, Microscopic Description, Impression, DX, and what is printed with no label as “Findings”. A part with any word read unsurely is marked, with its strip of the page, to be put right and confirmed. From the header only the laboratory and the referring doctor are taken; the signature and the footer are not read.
- Check each marked figure against the page: put it right if it needs it, then press Correct. When every one is checked, press Add to the file; it cannot be pressed before. Any row can be Edited, or removed with ×.
- If the reader on this computer struggled with a page, press Read with AI instead. That is charged, and the price is shown before it reads: under one credit for a short report of three to five lines, about two for a one-page CBC, around three for a dense thirty-line page.
Replacing or Deleting a Report
Open a report and there are two buttons at the foot of it. Replace with a new scan: if the scan is blurred or the wrong page, scan it again; the new one takes the old pages’ place and the figures read from the old scan are cleared. The new scan is read at once, free; Not now leaves the checking for later. Delete this report: you are asked to confirm, then the report and its scanned pages are removed from the file; the log records what was deleted and when.
A Report Scanned on the Assistant’s Phone
When the assistant photographs a report on the phone and sends it to the patient’s file, it is read on your computer the moment it arrives, free. Open the report and the figures are there, the doubtful ones marked; check them and add them to the file. The figures and the marks are never shown on the assistant’s phone; checking them is the doctor’s.
The Patient’s Name on the Report
When a report is read, the patient’s name printed on it is read too and checked against the file at once, leaving out Md., Mst. and Mrs., and allowing for a diagnostic centre’s small spelling slips: a letter missing, extra or changed.
If the name does not match, a red warning appears and the report is not saved, unless you tick that it is this patient’s and the name is only written differently, in which case the report keeps a note that you confirmed it. If the name cannot be compared (the file in Bangla, the report in English, say) there is a yellow warning only. A report scanned on the assistant’s phone is checked the same way when it is read, and can be removed from the wrong file right there.
What It Could Not Read
This is the part that matters most. Anything not plainly legible is named in its own amber panel and left out of the table. A tidy table with a row silently missing would give you no way to tell which figure was read and which was inferred, so check those rows against the paper yourself.
What It Does Not Do
- It does not interpret. Only rows the report itself marked H or L show in red; it never decides for itself that a value is abnormal.
- It does not convert units. One laboratory’s mg/dL is never turned into another’s µmol/L; that would make the comparison untrue.
- It does not supply a reference range from memory. If the paper prints none, the column stays empty.
- It does not keep the picture, only the values. You have the paper, and photographs would make the file ten times the size within a year.
Outside the Report’s Own Range
A row the laboratory marked H or L stays red. But laboratories are inconsistent about it: a low haemoglobin comes back with an L beside it, while an MCV of 71.4 against a printed range of 80–100 comes back with nothing at all. So anything falling outside the interval printed on the same page is marked separately. That is arithmetic: two numbers printed on one page, compared, and not a reading of the result.
How far outside is shown too. A figure more than half the width of the report’s own interval beyond the boundary sits in a red cell, because a whisker past the limit and a long way past it should not look the same on a screen. The yardstick is that same printed width. A one-sided range like “< 200” has no width, so such a figure is marked outside but never *well* outside; that claim would need a number the paper did not print.
Setting It Beside the Last One
Last time’s figure for the same test sits under the name, with its date. If the change is more than half the width of that report’s own reference interval, it is called out. The yardstick is the laboratory’s, not a threshold we invented, and where the units differ the earlier figure is shown but not compared.
Where the file holds more than one report of the same test, they are listed together, newest first. Names are matched as printed, ignoring case and a bracketed suffix: “Haemoglobin” and “Haemoglobin (Hb)” are one test. A bare “Hb” is not assumed to be the same; that is a clinical judgement, and the software does not make those.
If this page did not get you there, write to support. Tell us where it stopped making sense and we will fix the page too.